Tuesday, March 30, 2010

Italian Easter Pie


Italian Easter Pie, Pizza Rustica, Torta, Easter Pie, whatever you call it, it's good.  I had never even heard of Easter pie until I moved to the East Coast.  Take a savory double crust pie and fill it with eggs, cheese and meat.  My crack researchers (Google and I ) tell me it is an Italian tradition that marks the end of meatless meals and is usually served on Easter morning or the day before.

I'm not Italian and it's not quite Easter yet but every year around this time I remember to make this. While everyone is pretending to be polite while coveting the last remaining piece, I think "Why don't I make this more often?"  There are as many recipes and variations of this dish as there are Nonnas but here is my version.  Oh, and take it from me, you might want to clarify to your children that no, pie for dinner does not mean what they think it means. Hopefully after one taste, they'll forgive you.


Italian Easter Pie
Serves 8

2 9-inch pie crusts (your favorite recipe or store-bought)
6 eggs + 1 egg for egg wash
2t olive oil
1 small onion, finely diced
8 oz. diced prosciutto
8 oz. ricotta cheese
2 oz. shredded sharp provolone cheese
2 oz. Grana Padano cheese
2 oz. shredded fresh mozarella
3 T grated Parmesan cheese
1t water
pepper

1. Preheat oven to 350.
2. Roll out your bottom pie crust.  Place the bottom pie crust in a 9-inch deep dish pie pan.  You could also use a cake pan for this.  Do not crimp sides yet.
3. Saute diced onion in olive oil until soft and golden, about 5 minutes. Let cool.
4.  In a large bowl, beat 6 eggs. Add the ricotta and whisk until lumps are gone.  Add prosciutto, provolone, Grana Padano and mozzarella cheese.  Add cooked onion and black pepper to taste.
5. Sprinkle grated Parmesan cheese on the bottom pie crust.
6. Pour egg mixture into your pie crust.
7. Roll out top pie crust and place over pie.  Fold the overhang of the top crust over and tuck it behind the edges of the bottom crust.  Crimp them together.
8. Beat your remaining 1 egg with 1 teaspoon of water.  Brush over top and edge of pie.  Cut a slit in pie to vent.
9. Bake 40-50 minutes until top starts to look golden brown.
10. Let rest for 10-15 minutes before serving.  This is important so it won't ooze all over when you cut it!

**Do not be tempted to add any salt.  You get plenty of salt from the cheeses and prosciutto.  Feel free to substitute a different combo of Italian cheeses or meats.

Saturday, March 27, 2010

Comparing Oranges to Oranges

I found a variety of oranges at my local Whole Foods this week.  Have you ever wondered what the side by side difference would be in the different varieties?  Let's investigate, shall we...
 L to R: Cara Cara, Blood Orange, Minneola

Let's peruse their innards...

The Cara Cara has fruit that has a light pink tinge to it.  It has bigger segments than the others or even a navel orange.  The taste leans towards grapefruit, it's not as sweet as the others.  It's a little past Cara Cara season which may have accounted for this one being tougher and less juicy than the other oranges.

Blood Oranges are distinctive by the blush of dark red on their skins.  The inside is a beautiful ruby red color.  I love blood oranges.  They are juicy and sweet but more tart than a navel orange.  They make a striking addition to desserts and salads.  Try making a blood orange mimosa or blood orange margarita!

The Minneolas are sold with the stem and leaves intact which makes them not only a great eating orange but a nice centerpiece too.  The fruit of the minneola was very juicy and sweeter than the other two varieties with a tangerine flavor.

You really can't go wrong with any of these.  Putting the oranges together gives you a nice range of color and flavors.  Cuz as my mama always said,
"When God gives you oranges, make ORANGESALADWITHPARMESANANDALMONDS." Or something like that.

Orange Salad with Parmesan and Almonds


3 oranges, any varieties
2 cups of arugula
1 ounce thinly shaved Parmesan
1 handful of smokehouse almonds
3t olive oil
Juice of the supremed oranges
Coarse Sea Salt & Pepper

1.  Supreme the oranges.  For a video demo of how to do that, click here.  Save the leftover orange carcasses and squeeze their juice into a bowl.
2. In separate bowl, toss the arugula with the olive oil and a tablespoon of the reserved orange juice.
3. Put the dressed arugula on a platter.  Arrange the orange segments, Parmesan shavings and almonds over the arugula. Drizzle on a little extra orange juice if you like.
4. Sprinkle a pinch of coarse sea salt over the salad and a grind of fresh black pepper.

Thursday, March 25, 2010

Get Thee To A Fishery


Are you intimidated by fish?  I have some deep-seated shark issues (thanks for taking me to see Jaws when I was 9, Dad!) but cooking fish is not as scary as it seems.  For the following recipe, I used a whole Branzino which is a mild, white fish that was ON SALE!!!  This recipe is simple, delicious and could be done on a grill too (just put the fish on a piece of heavy duty foil first).  It's impressive for a dinner party because it looks beautiful but takes you no time to cook.  Make sure everyone gets a piece of the crispy top fillet and the flavorful bottom fillet.

When you are purchasing a whole fish look for 3 things:
1. Does it smell fishy?  It shouldn't if it's fresh.  Ask when the fish came in.
2. The eyes should not be sunken or cloudy.
3. Most importantly, the gills of the fish should still be a healthy red color.

Ask the fishmonger to clean the fish for you (lest you want fish scales all over your hair, clothes and kitchen.)  Ask them to butterfly and bone it for you.  Head and tail on or off is your choice.  I leave them on until after cooking.

 This is what it will look like after being cleaned, butterflied and deboned.  Run your finger over the flesh and pull out any little bones they may have missed.  

Whole Roasted Fish
Serves 2

1 Whole Branzino (or other fish)
1 t crushed fresh garlic (use a garlic press, not that nasty store bought kind)
1 lemon, sliced in rounds as thin as you can make them
3-4 fresh basil leaves
a pinch of crushed red pepper
2t olive oil, divided
salt and pepper

1. Preheat oven to 500 degrees.
2. Place the fish on a sheet pan.  Open up the fish. Coat the flesh with 1 t of olive oil and salt and pepper.
3. On the bottom half of the fish spread the crushed garlic and red pepper flakes.  Layer the basil on next, followed by 3 lemon slices.
4. Close the fish back up and with a knife score the skin of the top of the fish 3 times with a sharp knife. (This will prevent the fish from curling up.)
5. Coat the outer skin with the remaining teaspoon of olive oil.  Lightly salt and pepper skin.
6. Roast the fish for about 10 minutes.  The flesh should flake but still be moist and the skin should be crisp.
7. If you like, drizzle a tiny bit more olive oil over the finished fish and serve.  

*Note: You could use any herbs or flavors for this recipe.  Substitute sesame oil for olive oil,  lemongrass and ginger and use soy sauce instead of salt for an Asian flavor.

 Layering on the flava!

Scored and ready to roast

Monday, March 22, 2010

Eating In Week Comes to an End


Day 6 of eating in was...leftovers.  A little of this, a little of that, something for everyone.  We have leftovers about once a week.  But we're fancy people so we call it a "buffet".  On Day 7 I made a sausage lasagna with salad for dinner and BAM-POW the week of Eating In was over. 

What did I get out of this week?  For one, I became more improvisational with my recipes.  If I didn't have an ingredient, I had to substitute something else.  Another attitude shift for me was on restocking items.  In the past if we ran out of cereal, I went to the store that day to buy more.  This week I said, "We're out of cereal but we do have yogurt, oatmeal, pancakes, waffles, eggs...take your pick."  When those things are diminished, then I will spend more money on cereal. All in all the week was painless.

The Pros:
-I spent only $8.36 at the grocery store this week (a gallon of organic milk and some toilet paper).
-I reorganized my pantry and moved things to the front of the shelf that needed to be used up soon.
-No one in the family even realized I was doing anything different this week.
-My refrigerator is no longer overstuffed and I made a small dent in my freezer stash.

The Cons:
-I honestly can't think of any. Unless you count my smug sense of self-satisfaction (but my people are used to that.)

Sunday, March 21, 2010

Eating In Day 5

Soup weather will soon be a thing of the past.  Having a sick kid home for 3 days gave me a reason for this soup to be my winter swan song.  This was a "what do I have in the pantry that can become soup" kind of recipe.  That's the great thing about soup.  It's not all persnickety about weights and measurements.  It's got a the-more-the-merrier kind of attitude.  And it doesn't even mind when you've worn your pj's for 3 days straight and watched every episode of The Suite Life on Deck with Zack and Cody. 


Pasta e Fagioli Soup
Serves 8

1 T olive oil
4 ounces pancetta or bacon (I had some guanciale in the freezer), diced
1 medium onion, finely chopped
2 celery ribs, diced
2 cloves garlic, minced
a pinch or two of crushed red pepper
1 tsp dried oregano
1 28 oz. can of whole or diced tomatoes
5 cups of stock (I used 2/3 chicken stock and 1/3 beef stock because that's what I had and needed to use up)
1 cup of water
1-2 Parmesan rinds (I keep these in the freezer when I finish a piece of parmesan-they add great flavor to soups)
2 15 oz. cans white beans (like cannellini), drained
1 1/2 cups of dried pasta (I used elbows)
salt to taste
Grated Parmesan

1. Put 1 T olive oil in dutch oven and cook pancetta or bacon until cooked.
2. Add onion and celery and cook until softened.
3. Add garlic and saute.  Do not let it get brown or cripsy.
4. Add your pinches of red pepper, oregano and can of tomatoes.
5. Add stock and water and parmesan rind and bring to a boil.
6. Add salt to taste.
7. Add beans and pasta and cook until pasta is done, about 10 minutes.
8. Sprinkle with grated parmesan and serve.


If pasta absorbs too much of the liquid once the soup sits, add more water or stock.

Saturday, March 20, 2010

Eating In Day 3 & 4

OK now, where were we?  I was sidetracked by a few things this week.  Beautiful, unseasonably beautiful weather made me spend less time cooking and more time outside doing this...

But still I stuck to eating in.  Day three we made stir-fry chicken and broccoli with black bean sauce  served over brown basmati rice.  I held off on adding sugar snap peas to the stir-fry as originally intended so that I could make them the side dish instead.  I blanched the sugar snap peas for 30 seconds, plunged them into ice water then dried and chilled them.  I added mandarin oranges from the pantry and drizzled with a sesame ginger dressing.  Sprinkle some sesame seeds on top if you have them.


Day four was pizza.  I didn't have any tomato sauce made so I used a sundried tomato pesto on the crust topped with fresh mozarella and turkey pepperoni.
 The pizza dough was made a few weeks ago and frozen.  I have tried many pizza dough recipes and while it's hard to duplicate the thin crust, wood-fired oven pizza I love, this recipe is my favorite so far.  It allows you to roll the dough very thin so it's crispy yet still chewy.  Double the recipe and put the rest of the dough in the freezer.  Total cost for pizza, about $5.  To have a pizza delivered to the house, $17.  And if you make small little rounds of dough, your family or friends can make their own pizzas thereby leaving more time for you to go outside and do more chalk art with small children.

Pizza Dough
Adapted from Jim Lahey, Co.
Makes four 12-inch pizza crusts

3 cups all-purpose or bread flour, more for dusting
¼ teaspoon instant yeast (such as SAF brand)
1½ teaspoons salt
1½ cups water

1. In a large bowl, mix the flour with the yeast and
salt. Add the water and stir until blended (the
dough will be very sticky). Cover the bowl with
plastic wrap and let rest for 12 to 24 hours in a
warm spot, about 70°.
2. Place the dough on a lightly floured work surface and lightly sprinkle the top with flour. Fold the
dough over on itself once or twice, cover loosely with plastic wrap and let rest for 15 minutes.
3. Divide the dough into 4 pieces and shape each piece into a ball. Generously sprinkle a clean cotton
towel with flour and cover the dough balls with it. Let the dough rise for 2 hours.
4. Stretch or toss the dough into the desired shape, cover with toppings and bake on top of a very hot
pizza stone.


Tuesday, March 16, 2010

Eating In-Day Two

The snow has all melted, the monsoon has abated and there is an unfamiliar bright orb in the sky today. I believe it's called "sun"?  This has me feeling very optimistic in spite of being home with a sick child today. 

We're on Day Two of eating in and using up those pantry and freezer items instead of spending more $$$ at the grocery store.  Night one was steak and asparagus on the grill.  I had a gorgonzola and spinach sauce left over from a chicken dish I'd made previously.  I also had one leek I needed to use up.  I braised the leek in white wine and added it to the gorgonzola sauce which became a bed for the steak.  I took farro from the pantry and found two slices of uncooked bacon in the fridge, some pitted dates in the pantry. I simmered the farro in beef broth and added the now cooked bacon and chopped dates for a side dish.


Night 2 continued our weekly ritual of the kids choosing the menu for one night each per week.   The youngest munchkin chose this:

Boxed Macaroni and Cheese.  What can I say, the kid loves the stuff.  Her superior older sister is of the opinion that, "Mom's homemade mac and cheese is soooo much better."  But Kid's Night rules dictate that no one can criticize the menu that has been created. She invented a fruit salad made with apples, bananas, grapes, vanilla yogurt and a dash of mini-marshmallows. On the side are green beans with lemon zest.

Leftovers from all meals get packed for the husband's lunch the next day. By doing this, I estimate we're saving about $2600 a year.  Lunch in Manhattan will run about $10/day.

Dinners ? Check. Lunches? Check.  Breakfast? Can you believe how much cereal costs?!  As promised here is a cost-cutting recipe for granola.  My calculations show I can make 36oz. of this granola for about $4.  The same amount would cost you $14 at the grocery store.


Granola
Makes 36 ounces
 
4 cups old-fashioned oats
1 cup slivered almonds or any nuts you like
1/4 cup unsweetened coconut
1/2 cup packed brown sugar
2T granulated sugar
1/4 teaspoon salt
1/2 teaspoon ground cinnamon
1/4 teaspoon ground ginger
1 teaspoon ground cardamom

1/3 cup vegetable oil
1/4 cup honey
3 teaspoons vanilla extract

1 1/2 cups of dried fruit

1. Preheat oven to 300 F.  Line two sheet pans with silpats or spray pan with cooking spray.
2. Combine oats, nuts, coconut, sugars, salt and spices in a large bowl.
3. Warm oil and honey on stovetop or in microwave until warm and combined.  Stir in vanilla.
4. Pour oil/honey/vanilla mixture over dry ingredients and mix well.  Divide between two baking sheets.
5. Bake for about 30 minutes (or until golden brown) stirring every 10-15 minutes.  Let cool, break apart and add dried fruit.  Store in airtight container at room temp.

This recipe is so flexible you can add flax seeds, wheat germ, change the sweeteners (sub agave nectar instead of honey), spices, nuts and fruits any way you like.  It's a great way to get rid of any dried fruits and nuts you need to use up.  And with all the money you're saving, go buy yourself somethin' purty.

Monday, March 15, 2010

Eating In Week

Many people are currently tightening their belts.  With a wobbly economy, you may be cutting down on extra expenses, boosting your savings in case of emergency or downright trying to scrape by.  Maybe you've reduced your grocery budget or have eliminated eating out? 

My challenge to myself and to you is...could you feed your family for the next week with what is in your house right now?  Could you make do with what you have on hand?  I am confident I can.

I'm going to start by giving you a peek into my pantry.  And no, I didn't clean it out or make all neat and fancy.  After all, it's not like you're company.
 Beans, tomatoes (in every form), soups.  You'd think I was running a taqueria by all the Mexican ingredients I have.  Arriba!

 Canned tuna, sardines & anchovies, tahini.
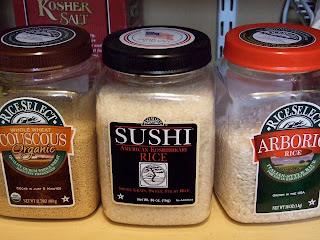
 Rices, bulgur, quinoa, couscous, barley, farro and pastas.
 Flours-AP, buckwheat, whole wheat, whole wheat pastry flour, semolina, cake flour, bread flour.

Right now my chest freezer contains frozen shrimp, ground turkey, chicken breasts and thighs, pork shoulder, sausages, ground beef, flank steak, salmon, chicken and veal stocks, pie crust dough and puff pastry dough, breads and a few frozen veg and fruits.

I know what you're thinking..."Did this girl live through the Depression? What's with the need for all this food? Didn't I see this on Hoarders?"  Well, it's my job to cook for people and create new recipes, test existing recipes, etc. I also shop for my proteins in bulk and then portion them out and freeze-much more economical!  However,  if you only stocked your shelves with chicken, veg or beef stocks, legumes, grains, pasta and canned tomato products and your freezer with some chicken, fish or protein of choice and vegetables you'd be amazed at the meals you can create. 

Start thinking like a chef who runs a restaurant.  Daily specials are usually made up of the items in the walk-in that are in abundance or need to be used up. Can you incorporate leftovers into new meals? Move the canned goods with the earliest expiration dates to the front of your cupboard and find a way to use them.  See how little you can spend on groceries this week and still eat well. 

I'll start posting my week's meals of eating in tomorrow and I'll also give you my favorite recipes for homemade bread, pizza crust and granola-all staples you can easily make for a fraction of what you'd pay for them at the grocery store.  Good luck and please share any cost cutting meal tips you've discovered in our comments section!

Friday, March 5, 2010

Cake Gallery

I donated two cakes to a local school for a cakewalk.  We used to have cakewalks as part of my elementary school carnival and it was my favorite part of the whole carnival.  Well, that and the spin art.  I always got lucky on the cakewalk and went home with a cake.  If only that luck had carried over to state lotteries and winning the HGTV dream home.  I hope some boy or girl will be exited to take home one of these...